
Guide · Takeoff method
How to do a quantity takeoff from a PDF on a Mac
A takeoff is only as good as its scale, its naming and its checks. This is the method I use, step by step, from opening the drawing set to handing over a spreadsheet of quantities.
Calibrate every sheet to its own scale and verify it against a printed dimension. Name each measurement after the item you will price. Measure areas, then lengths, then counts, deducting openings as you go. Run a check for double counting and unscaled sheets, then export the totals to CSV. On a Mac you can do all of this natively in an app like Project Blueprint, without Windows.
1. Prepare the drawing set
Most takeoff errors start before the first click.
- Confirm you have the current revision of every sheet. Check the title blocks against the drawing register.
- List the scales on the sheet list. Plans at 1:100, details at 1:20 and sections at 1:50 often sit in the same set.
- Note anything marked NTS (not to scale). Don't measure those sheets; take dimensions from the figures instead.
- Keep the PDFs in the job folder, not your Downloads folder, so the takeoff and the drawings stay together.
2. Set and verify the scale on every sheet
A scale error multiplies through every quantity on the sheet, and through areas it multiplies twice. A plan measured at 1:100 when it was printed at 1:50 gives areas four times too large.
- Calibrate from a long known dimension.In Blueprint, Measure › Calibrate, then click the two ends of the longest dimension you can find, such as an overall building length, and type its value. Longer dimensions reduce click error.
- Or set the printed scale.Measure › Set Scale lets you pick the scale from the title block, if you trust that the PDF was exported at true size.
- Verify against a second dimension.Measure › Verify Scale: draw along a different dimension line and Blueprint reads the figure beside it. If they disagree, it offers the right scale.
Each sheet keeps its own scale in Blueprint, so calibrating a detail sheet won't change your plans. For scanned sheets that have been stretched, set separate horizontal and vertical scales. The drawing scale guide covers the edge cases.
3. Decide how you'll name and group
Name every measurement after the line it will price against, before you start. In Blueprint, the subject is the name, and the Markups List groups and totals by subject, layer and page.
| Subject | Tool | Unit |
|---|---|---|
| Floor finish: carpet | Area | m² |
| Floor finish: timber | Area | m² |
| Skirting | Polylength | m |
| External wall | Polylength | m |
| Slab thickening | Volume | m³ |
| Door: single leaf | Count | No. |
Use a different colour per subject. It makes gaps and overlaps obvious at a glance, and it reads well when you hand the marked-up PDF to someone else.
4. Measure in a sensible order
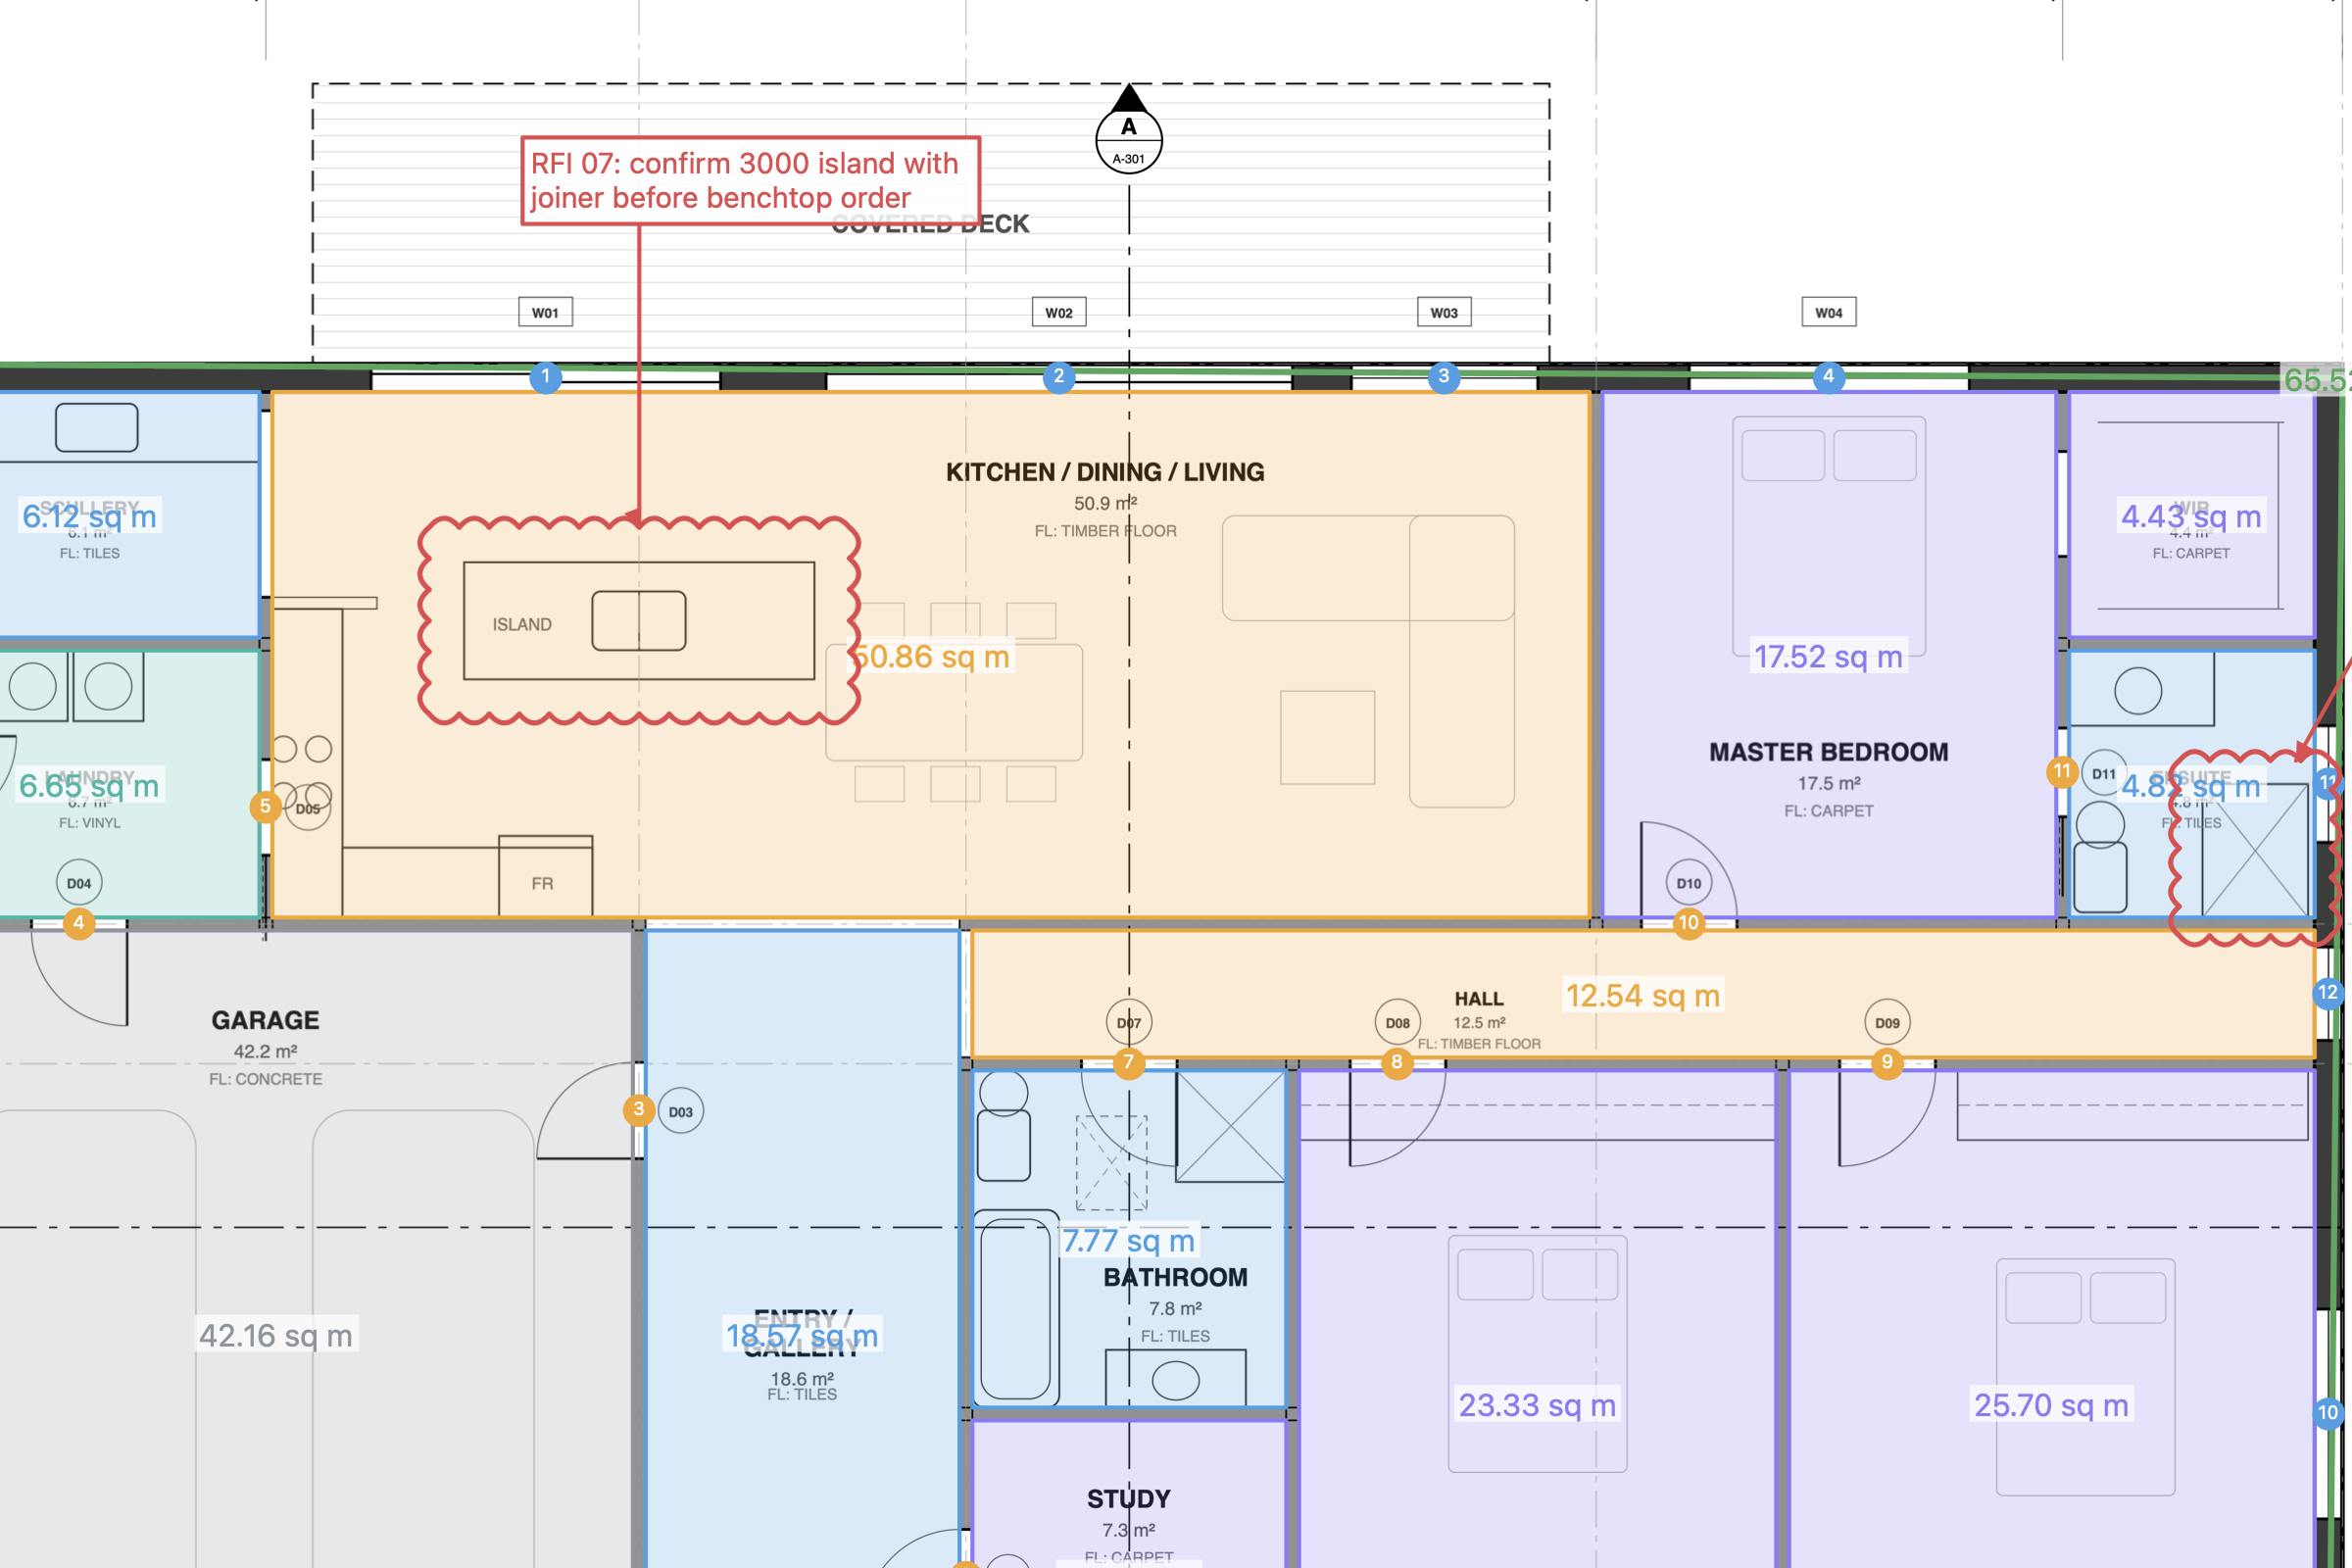
- Areas first. Trace each room or zone with the Area tool. Snap to the inside face of walls for finishes, or the centreline if your measurement rules say so.
- Lengths next. Walls, skirting, cornice and kerbs with Polylength. Use Perimeter when you need the edge of an area you have already traced.
- Volumes. Excavation, fill and concrete with Volume: an area plus a depth. The depth stays true if you later switch between mm and m.
- Counts last. Doors, windows and fittings with Count. Blueprint numbers each one as you click, so a skipped item stands out.
5. Deduct openings once, and only once
Use cutouts for voids, stairwells, columns and openings inside an area. In Blueprint, a cutout takes away only what is inside the area, and overlapping cutouts are only taken away once. Note your deduction rule (for example, openings over a stated size) at the top of the takeoff so the next person applies the same one.
6. Check before anything goes out
Run two kinds of check: the automatic one, and a sense check.
- Measure › Check Takeoff looks for areas counted twice, measurements on sheets with no scale, and a scale that doesn't match the one printed on the sheet.
- Sense-check the totals. Does the sum of room areas come close to the gross floor area on the cover sheet? Do door counts match the door schedule? If not, find out why before you price.
Totals from the fictional demo house shown above, measured in Blueprint 1.1.2.
7. Export and keep a record
- Quantities: Document › Export Markup Summary (CSV) gives you every measurement with its subject, page and quantity. It opens in Excel with numbers as numbers. Use Combined Summary to export every open drawing at once.
- Evidence: keep the marked-up PDF. Anyone can open it and see exactly what you measured, in Bluebeam, Acrobat or Preview.
- Summary for the file: Export Markup Summary (PDF) is a tidy printout to attach to an estimate.
8. Handle revisions without starting again
When a new revision arrives, open both versions and use Document › Overlay Compare to overlay, blink or swipe between them. Re-measure only the clouded or changed areas, and keep the superseded takeoff. Being able to show what changed between revisions is what settles variation claims.
Frequently asked questions
What is a quantity takeoff?
A quantity takeoff is the list of measured quantities taken from construction drawings: areas of flooring, lengths of wall, volumes of concrete, numbers of doors. It is the base for a cost estimate or a bill of quantities.
Can I measure a PDF drawing accurately?
Yes, if the PDF was exported from CAD at a known scale and you calibrate it. Check the scale against at least one printed dimension on every sheet. Scanned or resized PDFs need extra care, and sometimes separate horizontal and vertical scales.
Should I measure net or gross areas?
Follow the measurement rules your estimate is prepared to, such as NZS 4202 in New Zealand or the Australian Standard Method of Measurement. Whichever you use, deduct openings consistently and note the rule in your takeoff so someone else can check it.
How do I take off a revised drawing?
Compare the new revision with the old one first. Overlay or blink the two sheets to see what moved, then re-measure only the changed areas. Keep the old takeoff so you can show what changed and why.
Can I export the quantities to Excel?
Yes. In Project Blueprint, export the Markup Summary as CSV. It opens in Excel with quantities as numbers, ready to price or paste into a bill of quantities.
Sources
Prices and product details were checked on 13 October 2026. They change, so check each vendor's site before you buy.